

Here's how I make them.
I like to use WorldWin DoubleMates cardstock because it has two different colored sides and generally both sides show in quilled objects. Patterned paper is usually thinner but can also be used.
I use my Purple Cow guillotine paper trimmer to cut 5/16" wide strips that are 12" long. The samples here are Belgium Blue and Fairy Tale Pink.
I begin by folding the end of the strip, from about 1" into the strip, up and away from me. I guess the first fold is at about a 15 degree angle. I like to crease the fold with a bone folder. Here's how it looks:

I hold that fold firmly then bring the long side of the remaining strip toward me for another fold. I try to follow the angle of the first fold, so this fold is also at about a 15 degree angle. I like to crease this fold with a bone folder too. Here's how it looks:

Holding those two folds firmly and still, I take the long side of the strip and fold it away from me. The angle of this fold is a little bigger, at about 130 degrees. This is the last fold that I crease with the bone folder. Here's how it looks:

Now I begin curling from the short end of the folded strip, into the folds, toward the flat longer strip. The curl has to be a very tight curl. Here's a peek at how it looks as the curl begins, very loosely:

Holding the curl, very tightly, I begin to fold the flat strip, away from me, at the same angle, allowing a spot of the other side of the paper to show. Here's how it looks:

Curling as I move along, I continue folding the strip, away from me, until I reach the end of the strip. It's very important when quilling, that the curls be held tightly as the fibers in the paper warm and stretch to hold the curled shape. Try not to let go so the paper strip doesn't unravel. If that happens, don't worry about it, just start at the beginning and re-curl. Here's how it looks so far:

When I reach the end of the paper strip, I use a thin line of glue on the inside . . .

and hold it tightly for about 60 seconds to ensure the bond is secure.

These handmade quilled folded roses look stunning just as they are. I like to add some shimmer by smearing a blob of rock candy stickles over the surface of each rose. Every rose is different!
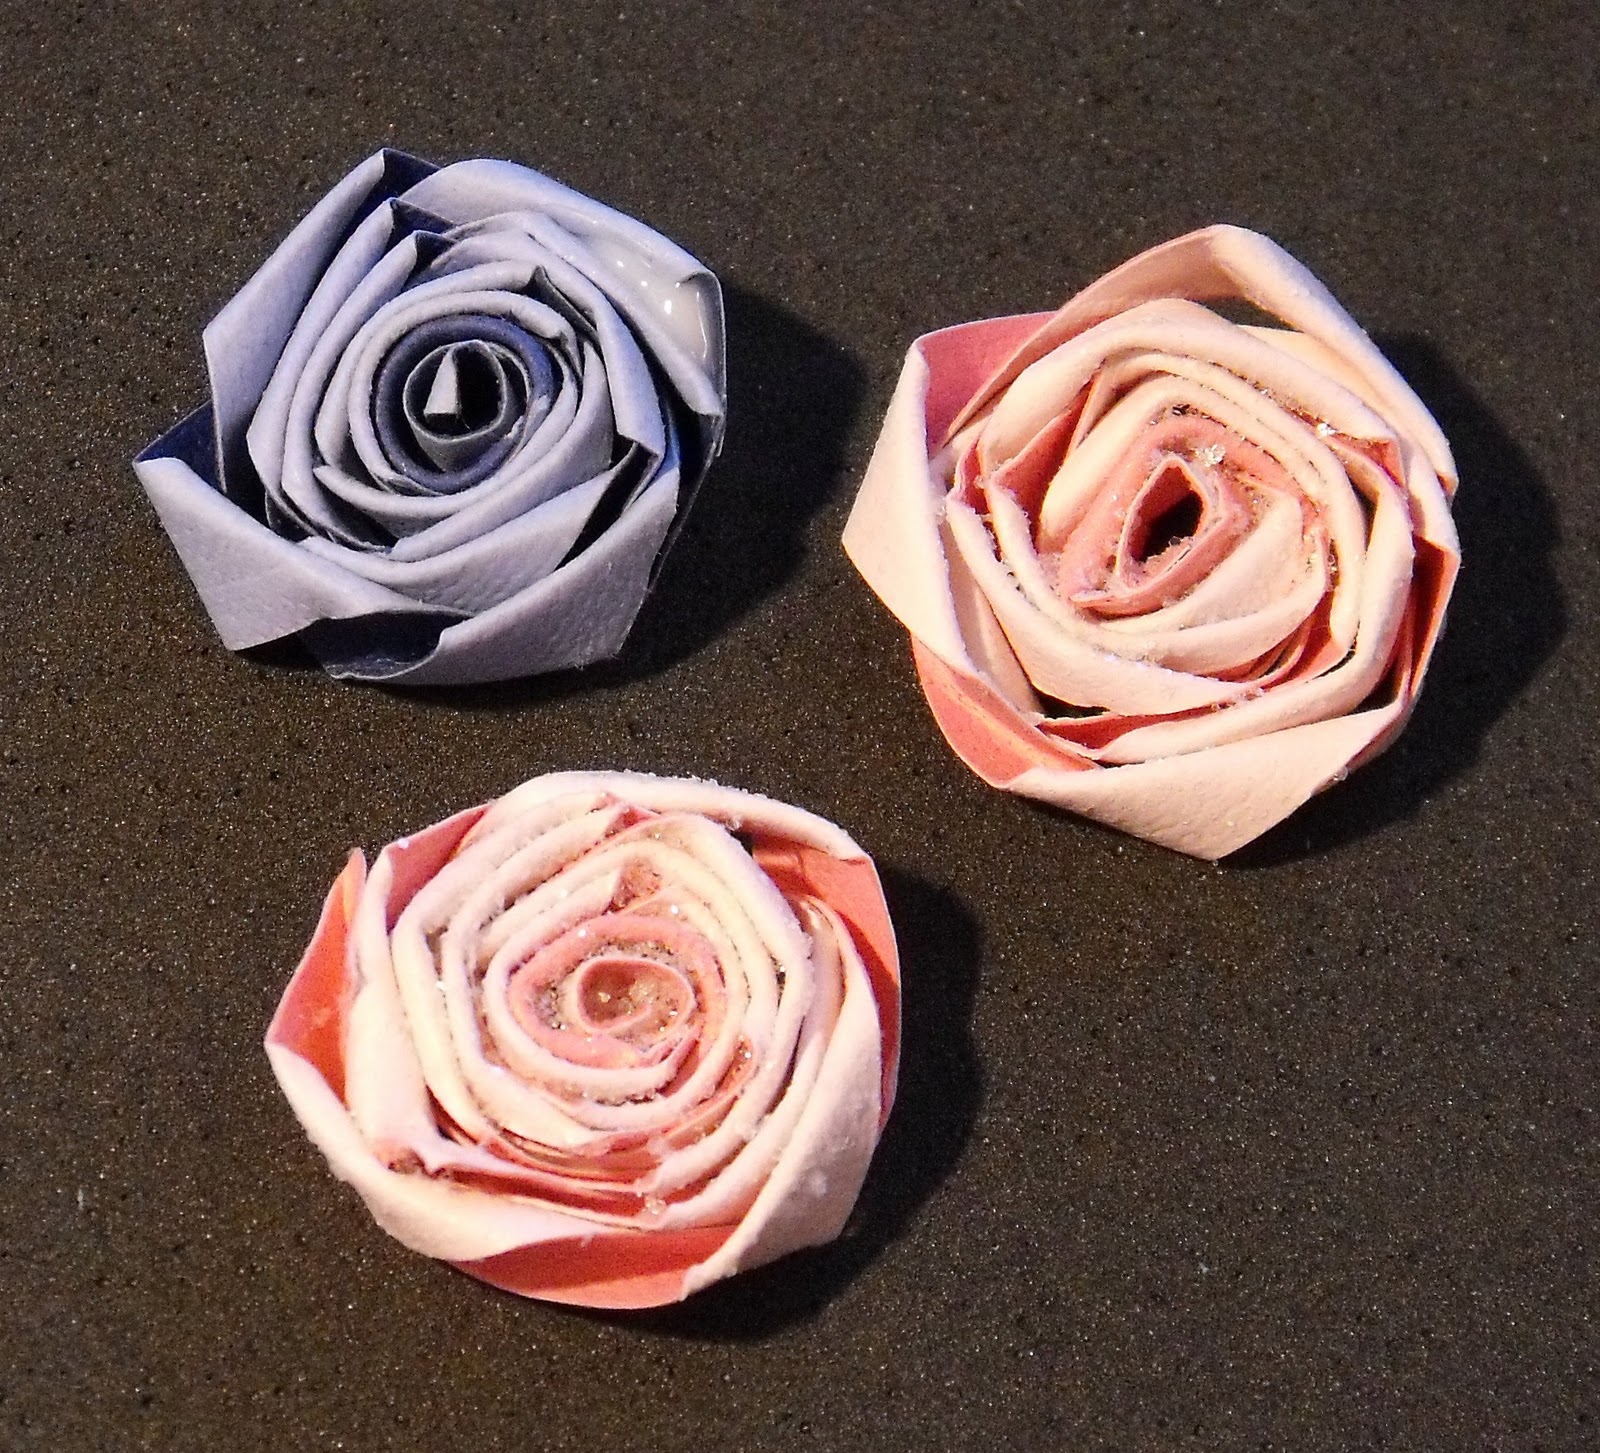
If the center of the completed rose is a little bigger than I'd like it to be, I'll cut a 1" piece from a 5/16" strip and roll it very tightly then insert that rolled piece into the center hole to fill it.
You can use strips of paper that are wider than 5/16" to make your roses too.
Enjoy! I'd love to see how you use your own handmade quilled folded roses.
See my Card Art with Copics and Quilled Folded Roses project here.


4 comments:
Thank you so much for sharing this! I can't wait to give this a try. They look amazing!
xMarie
Thanks so much for the tutorial Rose! I will definitely have to give these a try!!
Great tutorial, Rose! Thanks for sharing!
hugz, Z
I too will give this a try tomorrow, if I get a chance will photo the results!! Good or bad :)
Post a Comment